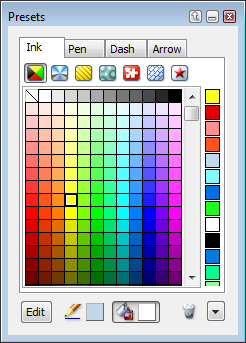
Use the Presets palette to apply inks, select the current inks for new objects, load inks, and delete inks.
Do one of the following:
Presets palette
The Presets palette menu, located at the bottom-right corner of the palette, contains all the commands for you to load, append, save, or clear inks.
Commands correspond to the name of the current ink type.
When you add or delete inks in the palette, the changes are recorded in a Canvas Settings file, not in the Canvas document, so the palette contents remain the same the next time you use Canvas.
Canvas won’t load or append inks that don’t correspond to the current ink type.
You can display color names that identify the inks that are stored in the Presets palette. This function affects all ink types in the palette. If an ink was not given a name, no name will appear.
You can also differentiate between RGB, CMYK, and spot colors when working with color inks by showing color icons.
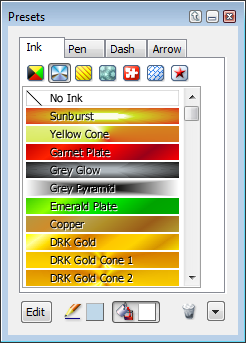
If the color ink type is selected, the inks will indicate RGB, CMYK, or grayscale percentages. For gradient, hatch, symbol, pattern, and texture inks, a name is displayed.
Open the Inks palette menu and choose Display Color Names.
Open the Inks palette menu and deselect Display Color Names.
Color icons help you identify RGB, CMYK, and spot colors when working with the color inks.
Selecting Show Color Icons only affects the appearance of the color inks in the Presets palette. The other inks are not affected.
Select the color ink icon and open the palette menu. Choose Show Color Icons.
Choose Hide Color Icons in the menu.
|
|
RGB color |
|
|
CMYK color |
|
|
Spot color |
The color inks can contain inks defined with RGB, CMYK, grayscale, and spot colors.
When working with color inks, if the Ink tab contains only CMYK colors, no symbols appear when you choose Show Color Icons.
Drag a cell within the palette and drop it where you want to place it.
Click the first ink cell and then Shift+click another cell. Canvas highlights all cells between the colors you click.
Ctrl+click the cells you want to select. Drag the selected cells to a new location in the palette.
Select the objects and then choose pen and fill inks.
Deselect all objects, then choose pen and fill inks. The ink icons in the toolbox show the current inks.
Drag the ink cell to the trash can.
Since pen inks are applied to the strokes of objects, the appearance of an object’s pen ink is affected by the shape of the object’s stroke (see How inks affect strokes).
 Color: Inks using solid colors.
 Gradient: Inks with smooth blends between two or more colors.
 Hatches: Inks with line patterns. Hatch inks can incorporate other pen and fill inks.
 Texture: Inks with patterns of raster images. Texture inks can include other inks as backgrounds.
 Symbol: Inks with patterns of vector objects, image objects, or text objects. Symbol inks can include any other ink as a background.
 Pattern: Inks that are 72 dpi bitmap representations with a fixed size of 8 x 8 pixels.
 Favorites: Drag inks here to add them to your favorites.
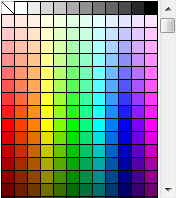
 Indicates no ink color


