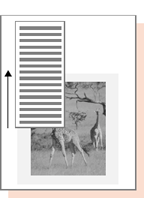
A 3-column section
A section is a rectangular area that arranges text in columns. A section is made of column guides, which are non-printing lines that define the text columns and gutters (spaces between columns).
Sections make it easy to arrange and modify text in columns. You can place one or more sections on a page. After you place text in a section, you can change the number or the size of the columns in the section and Canvas will adjust the text to fit.
To create text columns in a document, you could manually arrange separate text objects; however, the Section tool and column guides automate text layout. This section describes how to work with the Section tool and Column Guides to create text layouts.
|
|
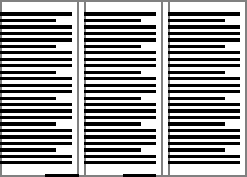
A 3-column section |
Create column layouts with the Section tool or Column Guides command (Layout | Column Guides). Use the Section tool to place multiple sections at specified locations on one or more pages. Use the Column Guides command to define sections or change settings for existing sections.
Whether you create or modify sections with the Section tool or Column Guides command, the Column Guides dialog box is the control center for configuring sections.
When you create a section, the section’s column guides appear on a guide layer in the document. By default, guide layers are non-printing and have a bright blue override color. Use the Document Layout palette to change the override color or make a guide layer printable (see Guide layers).
When you add text to a section, Canvas creates a text object in each column in the section. The text objects are placed on the current layer.
|
Section Name |
Canvas applies a default name when you create a section. Type a new name in the text box to change a section’s name. |
|
Section options menu |
Delete sections, fit sections to a page, or fit sections to the top half or bottom half of a page. Choose an option from the menu. |
|
Apply |
Depending on the layout, choose from This Page, All Pages, All Left Pages, Left Page, Right Page, or All Right Pages (see Apply To menu options). |
|
Preset column guides |
Select 1, 2, or 3 columns of equal width, or 2 columns with a wider column on the left or right. |
|
Number of columns |
Specify the number of columns; it overrides the preset column guides. Type the number of columns. The maximum number depends on the width of a section. |
|
Equal widths |
This option makes the column widths equal to the value in the Column box, and makes the gutter widths equal to the value in the Gutter box. Deselect this option to set the width of a specific column. |
|
Fixed widths |
This option prevents changes to the width of the columns. |
|
Fixed gutters |
This option prevents changes to the width of the column gutters. If both Fixed Gutters and Fixed Widths are selected, you can’t drag the column guides in a section to adjust the widths of columns or gutters. |
|
Vertical |
This option appears if “Enable two-byte script” is selected in the Configuration Center. It creates vertical columns for text in a section. |
|
Text Flow |
To change the direction of the text flow, click the button that indicates left to right (the arrow points right) or right to left (the arrow points left). |
|
Size |
If Equal Widths is not selected, set widths for columns and gutters. Column #: Select the column by number. The widths of the selected column and gutter appear below. Columns are numbered from left to right. Column: Enter the width of the column specified in the Column # menu. If you select a preset column option, the Column value can’t be changed unless Equal Widths is deselected first. Gutter: Enter the width of the gutter. |
If the document contains no sections, Canvas creates one or more new sections, according to the Apply To setting.
Select the Section tool. 
Use the Section tool to move, resize, and modify sections.
Drag it with the Section tool. When you move a section, text objects contained in the section move with the section.
Unlike vector, paint, and text objects, you can’t use the Selection tool to modify a section.
Do one or more of the following:
To change the settings of a section, double-click the section with the Section tool to open the Column Guides dialog box. Change the settings in the dialog box and click OK to apply the settings to the section.
Double-click the section with the Section tool to open the Column Guides dialog box. Open the Section Options menu and select Delete Section. Click Yes in the confirmation message box.
The Apply To setting controls how Canvas applies the column guides settings. When you click OK, Canvas modifies matching sections and creates new sections as necessary, depending on the setting selected in the Apply To menu.
You can display or hide all the section column guides in a document.
Choose Layout | Display | Show Guides when column guides are not displayed.
Choose Layout | Display | Hide Guides when column guides are displayed.
Use the Text tool to type text in a column in a section.
If a section has multiple columns, you can skip one or more columns by clicking in the section where you want the text flow to begin.
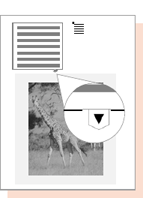
You can flow text when all the text won’t fit in a text object. An indicator tells you when an object has overset text. If you select a text object and drag a handle to reduce its size so all the text does not fit, the overset indicator appears. You can flow text between as many columns as you want.
Click the text flow pointer where you want the upper-left corner of the new column to appear.
Drag the text flow pointer to specify the column width.
|
|
|
|
|
Resizing a text column can result in overset text |
If you click the flow symbol, the text flow pointer appears |
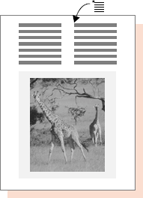
Clicking with the flow pointer creates a new column the same size as the original, and flows the overset text into it. A plus sign replaces the overset sign on the first column, indicating that text flows to another column. |