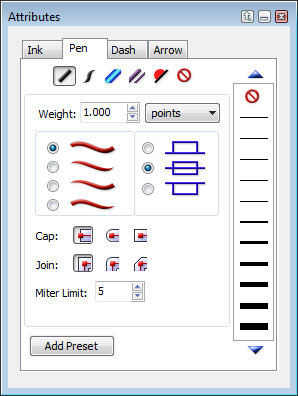
You can customize strokes in the Attributes palette:
Click the Add Preset button.
The new stroke or stroke attribute is added to the appropriate stroke type or tab in the Presets palette.
Select an object.
The respective stroke type manager or stroke attribute tab opens in the Attributes palette.
When you end a Canvas session, the program stores the stroke type and attribute presets with the program.The same presets are available, whether you work with new documents, documents you created, or documents created by another Canvas user.
If you create a custom stroke and want to apply it to more than one object, and especially if you want to use it in a later work session, you should add the custom settings to the Presets palette.
If you want to create custom standard pen or calligraphic strokes, use the respective manager in the Attributes palette.
Standard pen strokes have a uniform weight, specified offset, and may have tapered ends. Calligraphic pen strokes have a separate width, weight, and angle setting. For both stroke types, you can define the line joins (bevel, miter, or round) and end caps (flat, round, or square).
For basic information about setting pen size, see Using standard pen strokes.
You can choose another unit of measurement instead of points as the pen size unit using the unit menu in the Attributes palette.
Use these options to define standard strokes.
|
|
|
Calligraphic pen stroke |
For standard pen strokes and calligraphic strokes, you can specify the type of line joins and end caps. Line joins determine the appearance of two path segments that meet at a corner. End caps specify the shape of the endpoints of an open path.
Canvas has three types of line joins: miter, round, and bevel. For preset pen strokes, Canvas indicates the type of line join in the respective manager in the Attributes palette.
The miter limit setting tells Canvas which corners are too tight to miter; Canvas bevels these corners instead; i.e., if the miter limit is set to 10°, and two path segments join at an angle of 9°, Canvas bevels the corner rather than creating a miter join. The miter limit lets you prevent long, spiked corners that might result as a combination of a wide pen size and a small angle.
|
|
|||
|
Miter join, |
Bevel join |
Round join |
Miter join, |
Canvas has three types of end caps. For preset pen strokes, Canvas indicates the type of end cap in the respective manager in the Attributes palette.
|
|
Flush with endpoint |
|
|
Rounded at endpoint |
|
|
Square at endpoint |
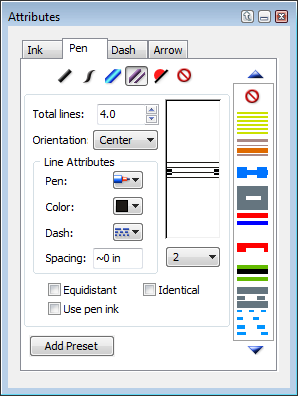
You can create custom parallel line strokes using the Parallel manager in the Attributes palette. Specify the number of lines, color, dash pattern, and pen size of each line, and line spacing.
Use these controls to create parallel line pen strokes.
|
Total lines |
Enter the number of parallel lines for the stroke. The minimum and maximum are 2 and 12, respectively. |
|
Orientation |
Specify the placement of parallel lines relative to the object’s path. Choose Center, Outside, or Inside. |
|
Line Attributes |
Use these controls to define the appearance of the stroke.
|
|
Equidistant |
Turn on this option to apply the spacing setting for the selected line to all lines. |
|
Use pen ink |
Turn on this option to apply a color to the spaces between the parallel lines. |
|
Identical |
Turn on this option to give all parallel lines the same appearance (pen width, color, and dash). |
|
Add Preset |
Click the Add Preset button when you have finished defining the stroke. |
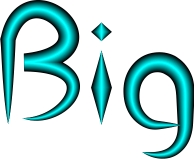
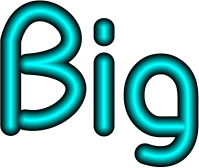
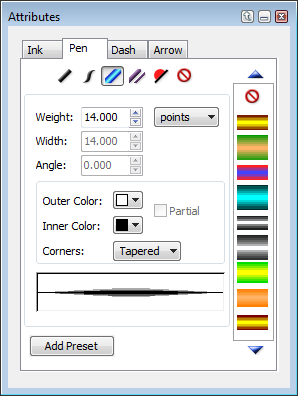
You can create custom neon strokes using the Neon manager in the Attributes palette. Specify the width, colors, line joins, and end caps as well as create uniform and calligraphic neon strokes.
To make the stroke appear round, experiment with lighter inside colors and darker outside colors.
|
|
Neon stroke with square corners |
|
|
Neon stroke with tapered corners |
|
|
Neon stroke with round corners |
Use these options to define a Neon pen stroke.
|
Weight |
Enter a value in the Weight field. The Weight refers to the thickness of the stroke. |
|
Width |
Enter a value in the Width field. The Width refers to the thinnest part of the stroke. For a standard stroke, the Width is equal to the Weight. For a calligraphic effect, the Width should differ from the Weight. |
|
Angle |
Enter a value (in degrees) in the Angle field. For a calligraphic stroke, the angle is typically set to 45°. |
|
Outer Color |
Select the color for the exterior portion of the neon stroke. |
|
Partial |
Select this check box to give the stroke a gradient effect. |
|
Inner Color |
Select the color for the interior portion of the neon stroke. |
|
Corners |
Define the appearance of the stroke’s corners: Round, Square, or Tapered. |
|
Add Preset |
Click the Add Preset button when you have finished defining the stroke. |
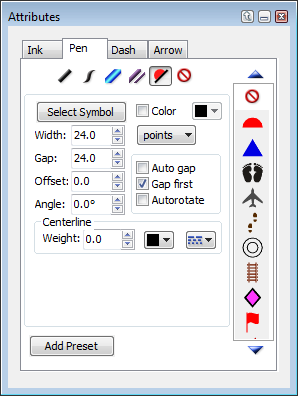
You can create custom symbol strokes using the Symbol manager in the Attributes palette. Select a symbol, and specify the width, color, gap, offset, angle and centerline of the stroke.
|
Select Symbol |
Click the Select Symbol button to select a different symbol. By default, Canvas symbol files are located in: C:\Program Files\ACD Systems\Canvas 12\Symbols |
|
Color |
Select the color for the symbol stroke. This overrides the color of the symbol. |
|
Width |
Enter the width of the thinnest part of the stroke. |
|
Gap |
Enter the gap between symbols. |
|
Offset |
Enter the offset between symbols and the centerline. This can be a positive or negative value. If you use a thick centerline, enter at least half the weight of the centerline as the amount of offset so that the symbols appear at the edge of the centerline. |
|
Angle |
Enter a value (in degrees) in the Angle field. "0" means no rotation, "180" means the symbol is flipped on both axes. |
|
Auto gap |
Select this check box if you want Canvas to automatically adjust the gap between the last and first symbols. For example, if you draw a circle object and you select this check box, Canvas adjusts the gaps between symbols, so that the gaps are consistent for all symbols on the path. |
|
Gap first |
Select this check box if you want to start the stroke with a gap. |
|
Autorotate |
Select this check box to automatically rotate the symbols based on the direction of the stroke. |
|
Centerline |
The centerline is the line that the symbols follow. If you want a line to appear, enter the weight, color and dash of the line. If you want the line to disappear, set the weight to 0 or the color to None. |
|
Add Preset |
Click the Add Preset button when you have finished defining the stroke. |